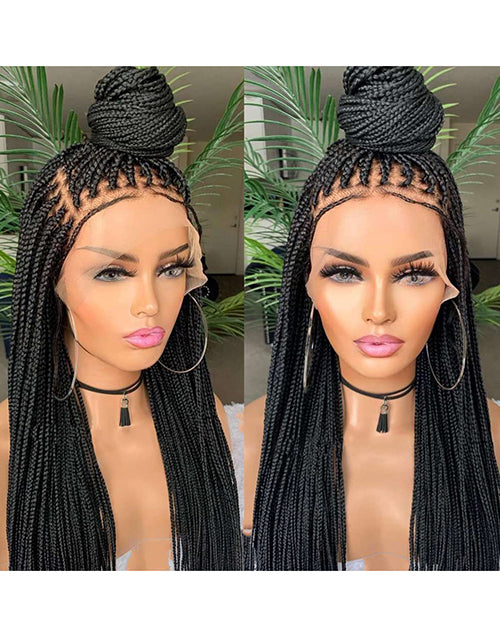
How to make knotless braids
Knotless braids are a popular and gentle protective hairstyle that can be worn for several weeks. The braids are created without knots at the base, making them less likely to cause tension or breakage at the hairline. Here is a step-by-step guide on how to create knotless braids, Also you can buy it on our store:
-
Start with clean and moisturized hair. It's best to wash and deep condition your hair the day before braiding.
-
Section your hair into small, even parts using a comb. The size of the sections will determine the thickness of your braids.
-
Take a small section of hair and divide it into three equal parts, like you would for a regular braid.
-
Begin braiding your hair by crossing the right section over the middle section, then the left section over the middle section.
-
As you braid, add small sections of hair to each section before crossing over. Take a small section of hair from the root of the braid and add it to the right section before crossing it over the middle section. Do the same with the left section, adding a small section of hair before crossing over the middle section.
-
Continue adding small sections of hair as you braid, ensuring that the braid is tight enough to stay in place but not too tight to cause tension.
-
Braid all the way to the end of your hair and secure the braid with a hair elastic or rubber band.
-
Repeat steps 3 to 7 until all sections of hair are braided.
-
Once all the braids are complete, you can cut off the hair elastic or rubber band at the base of each braid.

Tips:
-
It's important to make sure that the braids are not too tight, as this can cause damage to your hair and scalp. If you feel any pain or discomfort while braiding, stop and loosen the braid.
-
You can add extensions to the braids if you want longer or thicker braids. To do this, simply braid the extension hair in with your own hair.
-
To keep your scalp moisturized, you can use a scalp oil or spray on your braids.